How to Check GPU Usage and Information in Windows 11
In this tutorial, I will show you how to view the basic statistics for your GPU.
1. Open Task Manager
Open Task Manager by pressing Ctrl + Shift + Esc on your keyboard, or by right-clicking the Start button  and selecting Task Manager.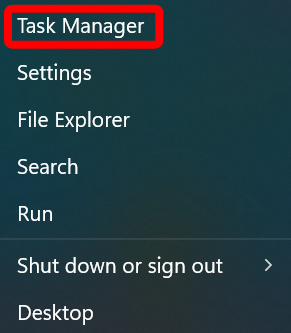
2. Performance Tab
In the left-hand menu (for the Task Manager), click the “Performance” tab.
3. Select your GPU
From the list, click your listed GPU. If you have more than one GPU (e.g., a laptop with dual graphics), you will see multiple GPUs listed.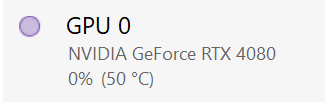
4. Check your Specs
You will now see various, real-time graphs. At the bottom, you will notice “Dedicated GPU memory“. This shows you how much video memory you are currently using (left side) and how much total, dedicated video memory you have available (right side).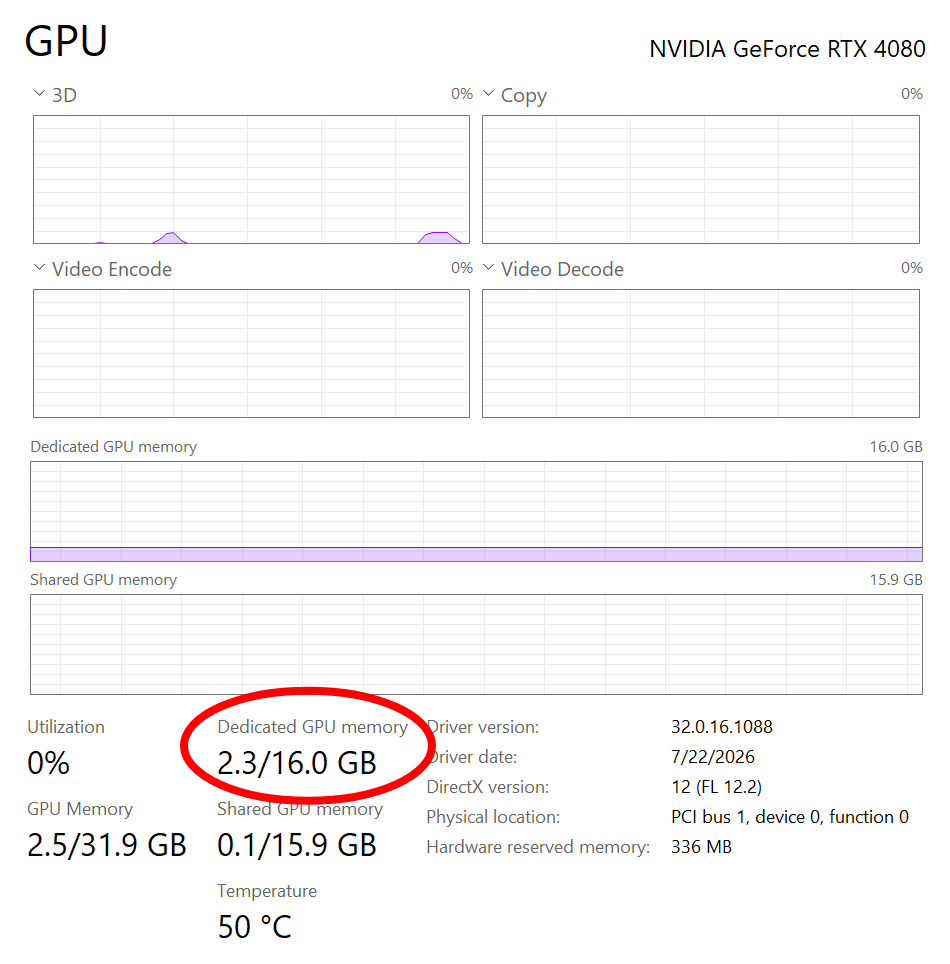
Obviously the Task Manager only shows a few statistics for your GPU. For more detailed information, you can use the GPU-Z or HWiNFO software.
That is the end of this tutorial. I hope this has been helpful to someone.
Posted in Computers, Operating Systems, Software, Tips & Tutorials
How to Enable or Disable Snap Windows in Windows 11
In this short tutorial, I will show you how to enable and disable the Snap Windows feature in Windows 11.
Snap Windows are useful when you want to quickly arrange multiple windows on your desktop. However, they can become irritating and even a hindrance to some people, if you want to position a window on the edge of the screen without triggering auto-snap.
With that little introduction out of the way, let us begin.
- Right-click on the Windows Start icon
 and click on the “System” menu option.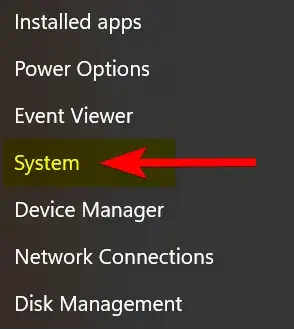
2. On the left-side panel, click on “System”, then click on the “Multitasking” option.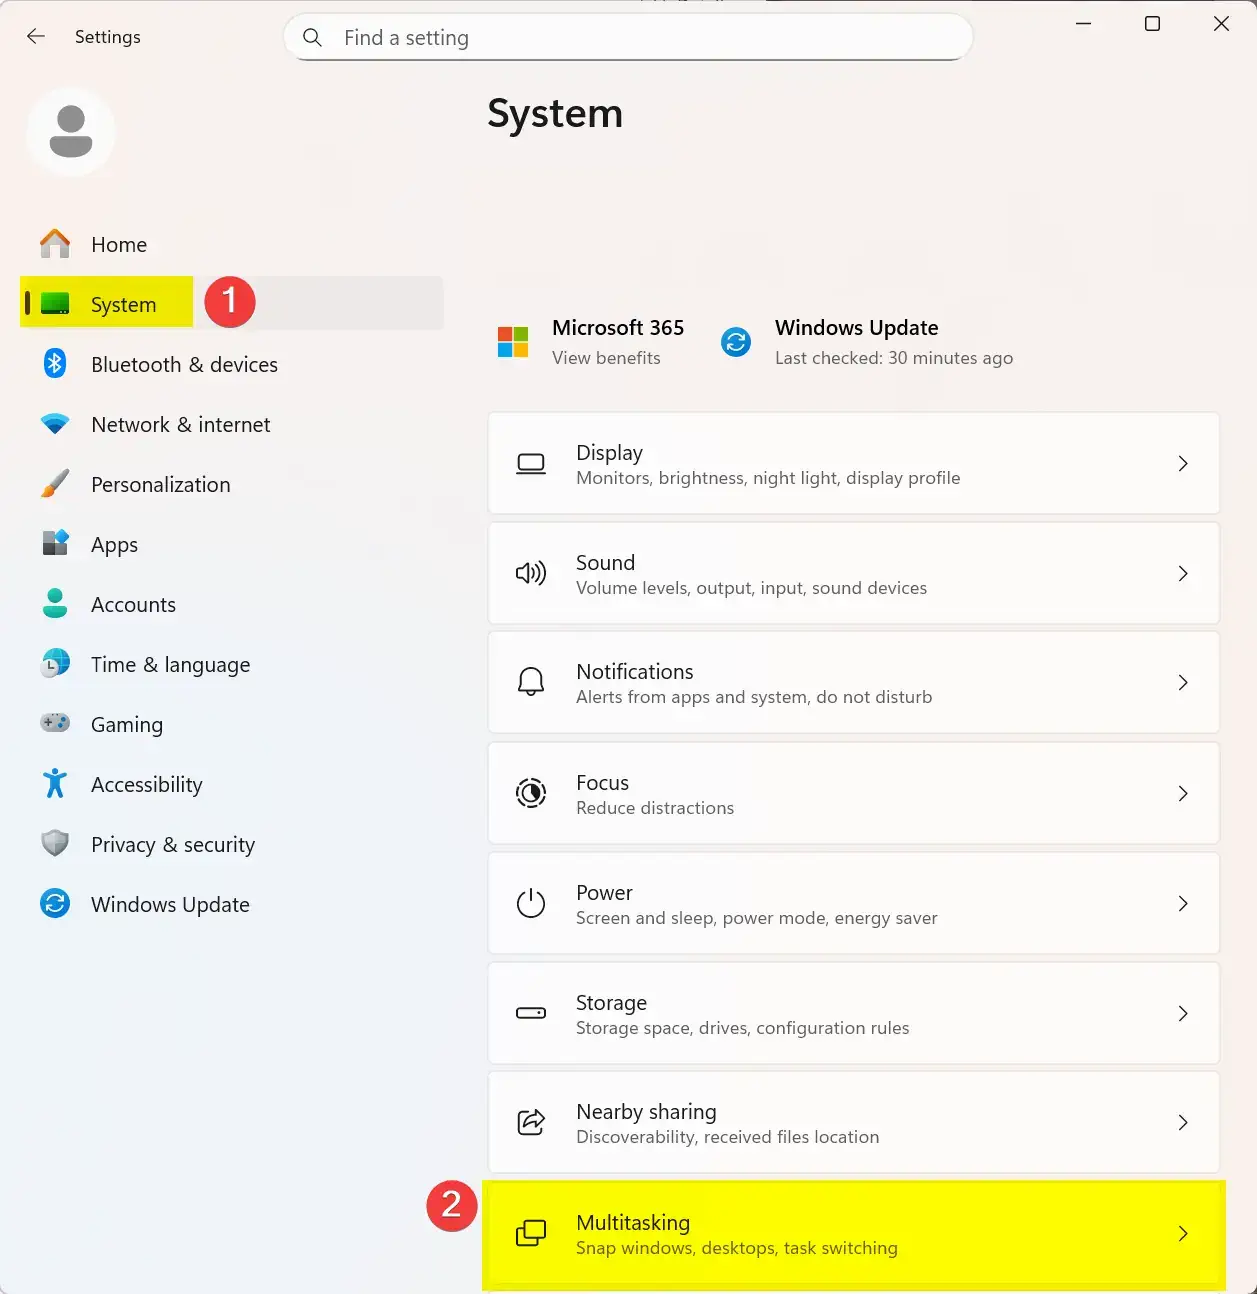
3. Now locate the “Snap windows” option, and click the toggle button to disable it. Of course, if sometime later on you wish to re-enable this feature, just click on the toggle button again to re-enable it.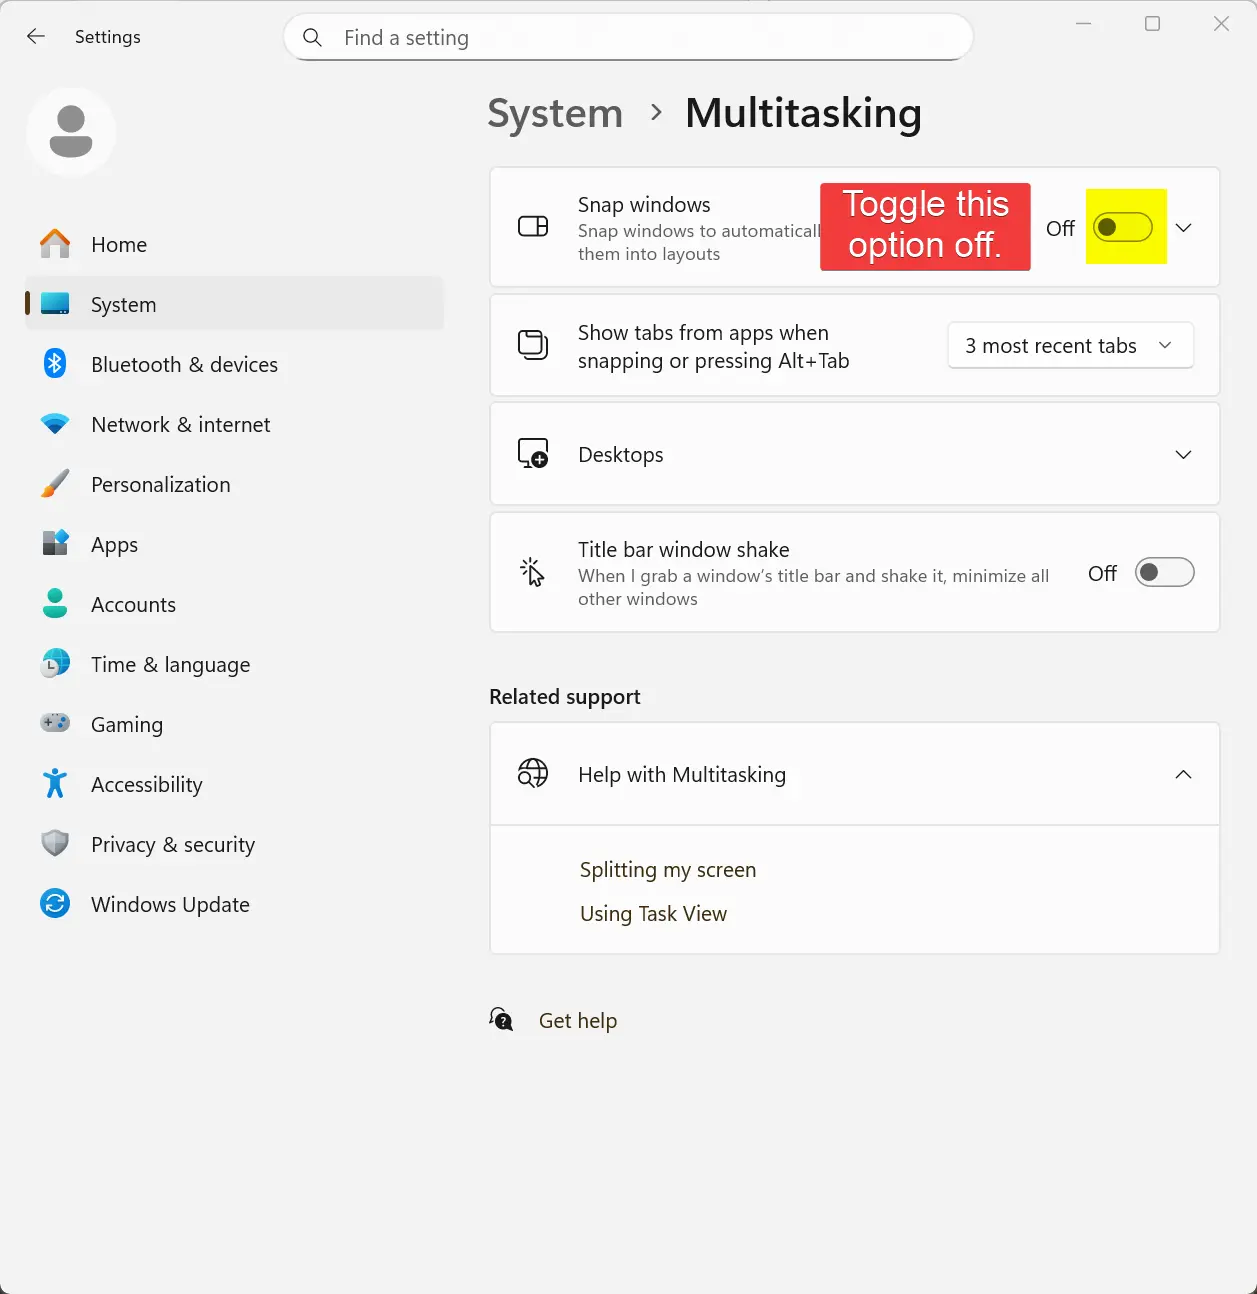
That is the end of this tutorial. I hope someone finds it useful.
Posted in Computers, Operating Systems, Tips & Tutorials
How to Show File Extensions and Hidden Files and Folders on Windows 11
In this blog post, I will explain how to show file extensions, and how to view hidden files and folders on your Windows 11 system.
By default, Windows 11 hides file extensions, and any files and folders marked with the attribute “hidden”. At some point, you may have a need to change a file’s extension manually (e.g., “.txt” to “.ini“). It can also be useful to see any hidden files and folders on your computer.
No reboot is required for these changes to take effect.
- Open the File Explorer.
- If you wish, you can use the [ Windows Key + E ] keyboard combination to open File Explorer.
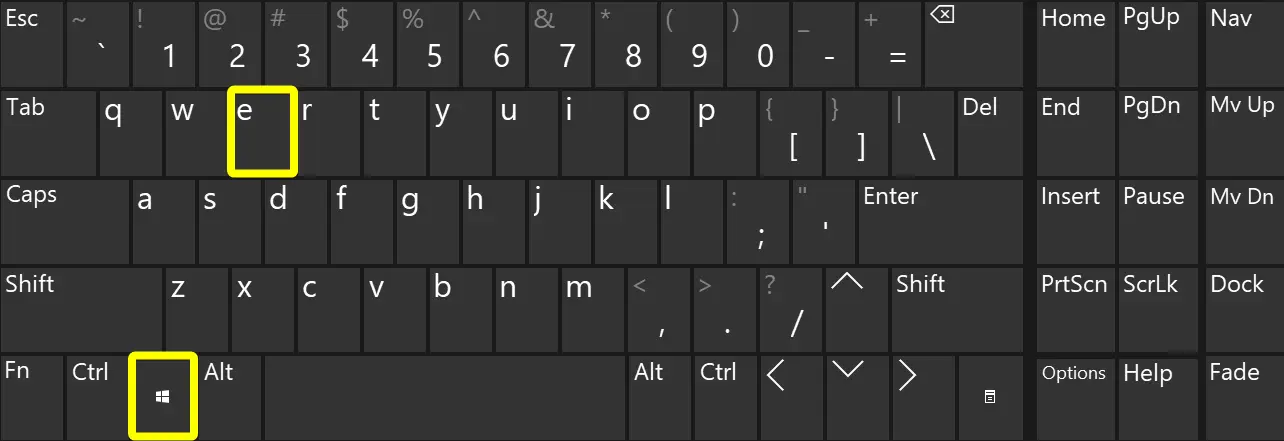
- If you wish, you can use the [ Windows Key + E ] keyboard combination to open File Explorer.
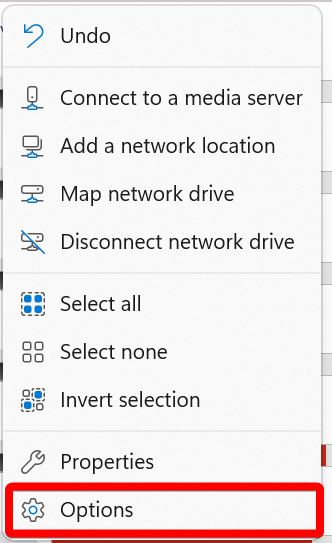
- After the File Explorer opens, click on the ellipsis menu button.

- Now click on the “Options” menu item.
- Click on the “View” tab.
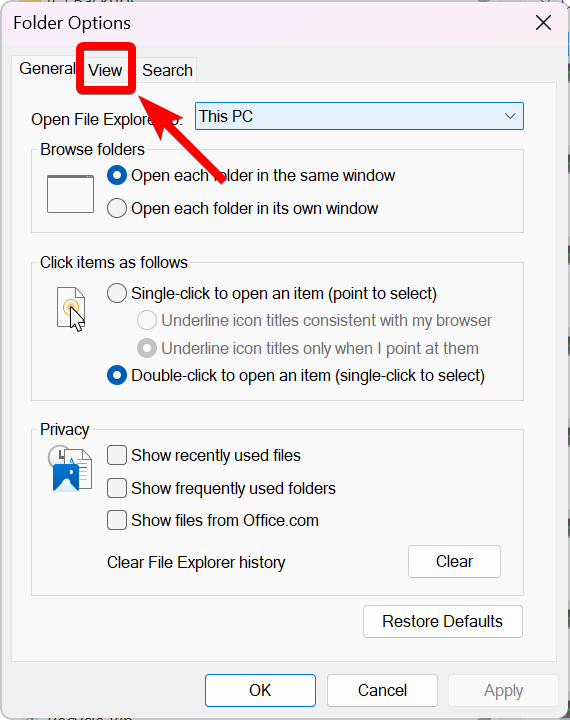
- Now do the following:
- Select the option, “Show hidden files, folders, and drives” (under “Hidden files and folders”).
- Uncheck the option, “Hide extensions for known file types”.
- Click the “OK” button.
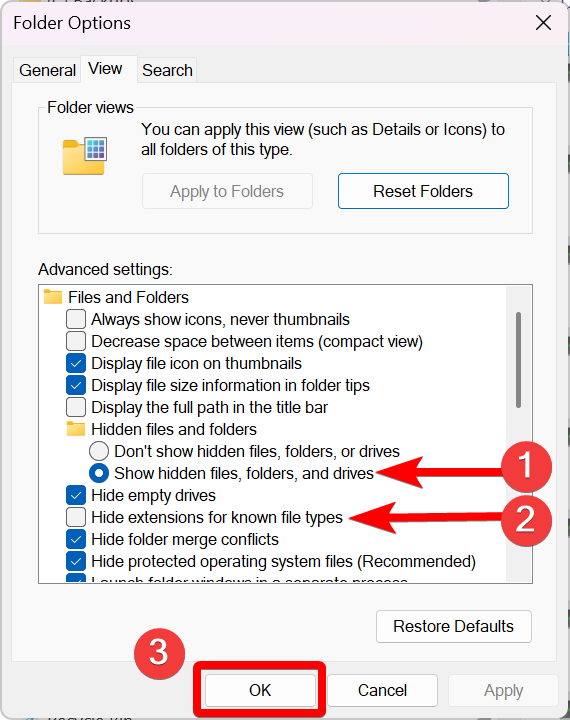
That’s it. You now can view file extensions, and view any hidden files and folders on your Windows 11 computer.
I hope you found this tutorial helpful.
Posted in Computers, Internet and Servers, Operating Systems, Tips & Tutorials